How Can We Help?
Printing Graphs
Printing a graph in the BehaviorFlow app is a simple process. It uses built-in features of the iPad.
User Hint: These instructions apply to any screen in the BehaviorFlow app. Graphs are among the most likely things to be printed.
Take a Screenshot:
When the screenshot is taken, a small window appears in the lower left corner of the screen, previewing the screenshot. Tap on that window before it disappears. If you miss tapping in time, either take another screenshot and try again, or see the section below about “Printing from the Photos app”.
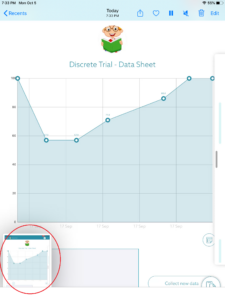
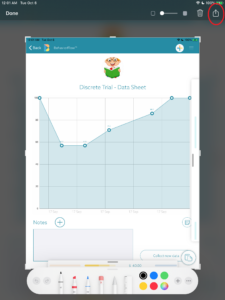
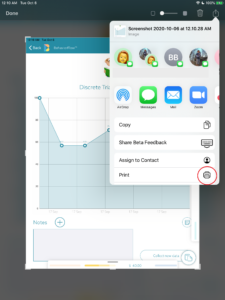
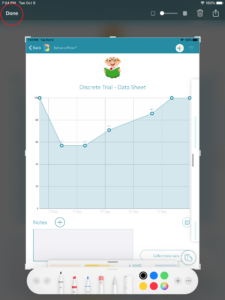
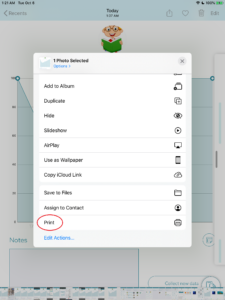
The screen shown on the left below appears; press the Share icon in the top right corner of the page. Next, press the Print icon in the pulldown window that appears.
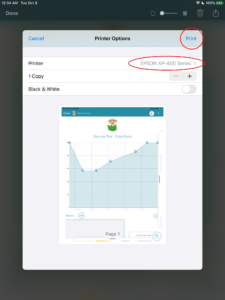
Print the Screenshot:
Once you select Print, available printers will appear in a pulldown under Printer *. Select your printer, press Print, and your graph will be printed!
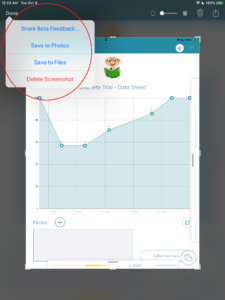
After printing, press Done in the upper left had corner of the screen. You can either Delete the Screenshot or Save it to Photos. If you’re done with the graph, you can delete it. If you’d like to view it or print it again, you can save it to Photos, in which case it is saved on your iPad in the Photos app.
You can also read below to see how to print a saved graph/screenshot from the Photos app.
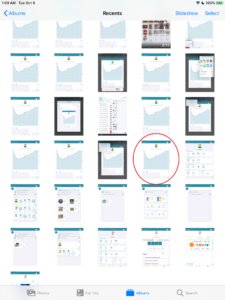
Printing from the Photos app:
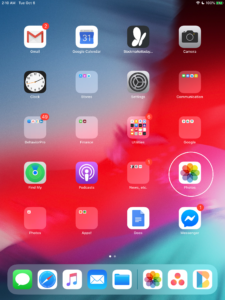
Whenever you take a screenshot, that screenshot is saved to the Photos app on your iPad. You can select any image in your Photos and print it also. Open the Photos app and click on the screenshot you wish to print. The selected screenshot will appear. To print the screenshot, click on the Share icon in the upper right corner.

Scroll down to the Print command and proceed as you did above under Print the Screenshot. Note that after the print is complete, you will return to the Photos app, and will not need to choose whether to Delete or Save to Photos, since the screenshot is already in the Photos app.
This is a test comment!
This is a test reply